DIY PLEATED LAMP SHADE
I am on a mission to make every lamp in my house feel unique and fun! I am saying goodbye to all of the white lampshades. Creating a pleated texture on this DIY lampshade is a really great way to bring in a bit of color and also add a traditional element.
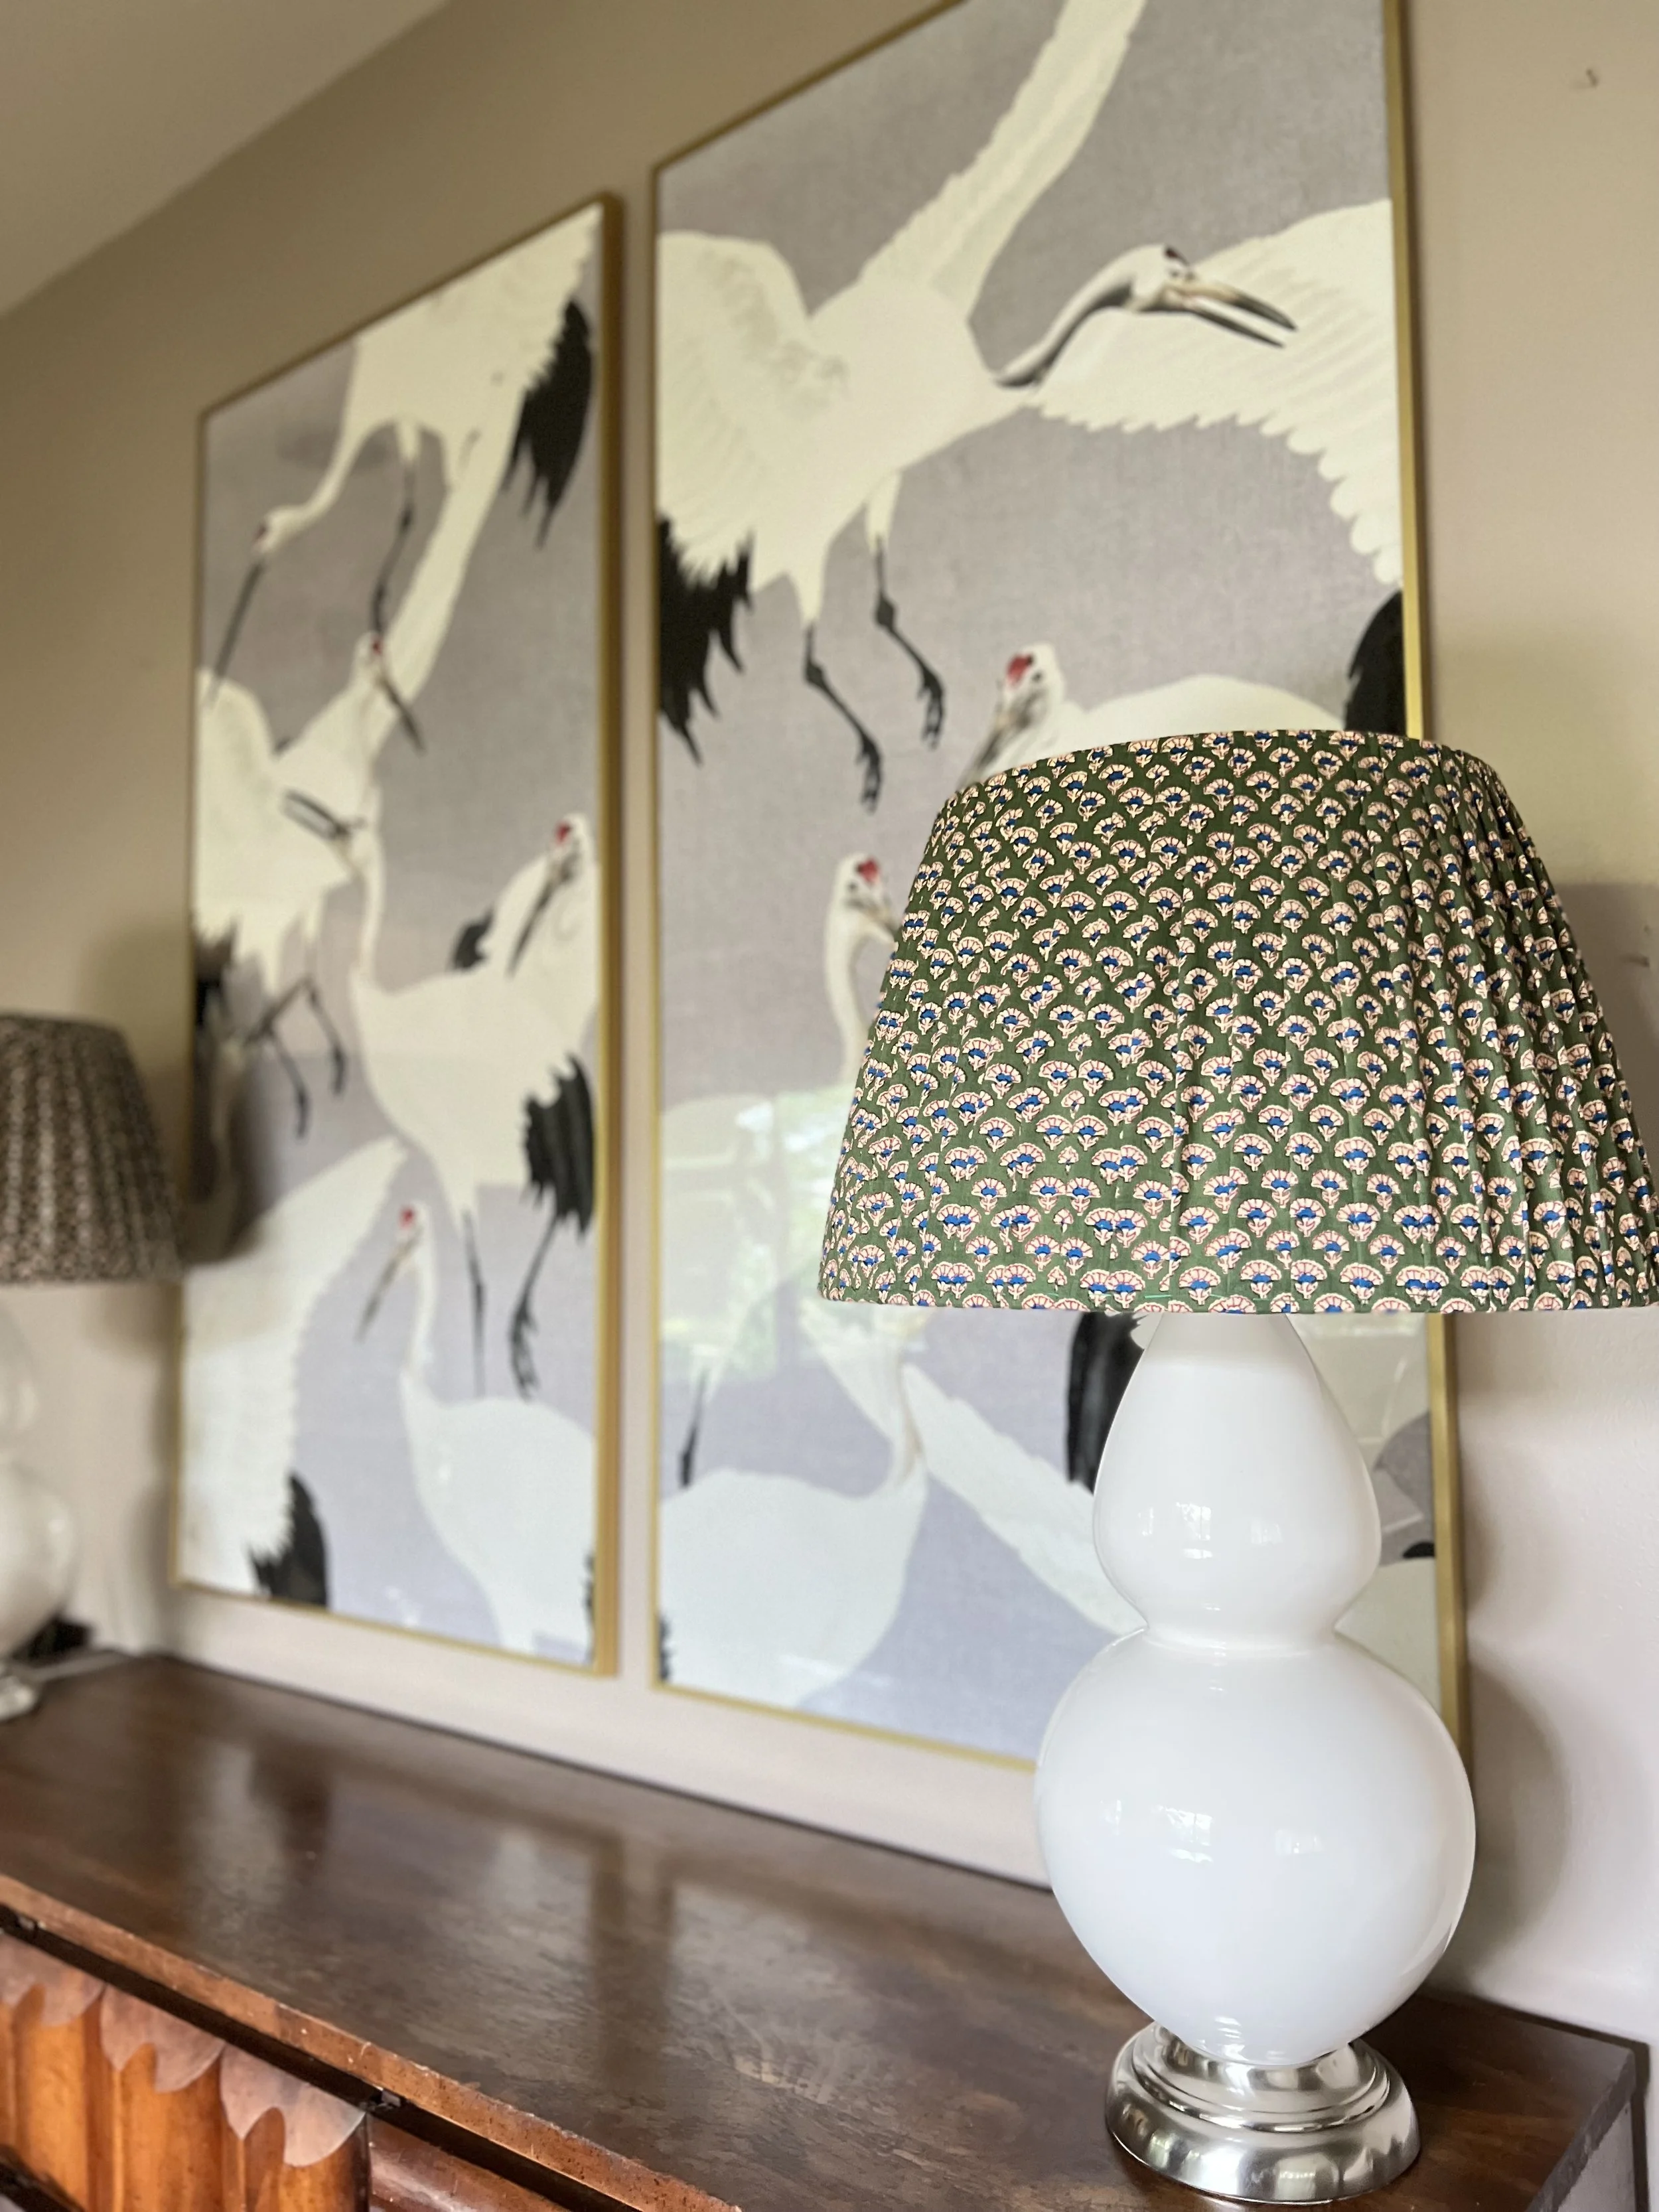
These types of lamp shades can be pretty pricey so I decided to see how hard it would be to make my own. I am 98% done with my first set and I would totally do this project again. My main piece of advice for a DIY lampshade: don’t be in a hurry. This is a tedious project and will take time to complete. If you have a sewing machine, there are lots of tutorials on youtube that show you how to do it a little faster but I chose to do it by hand. I am sharing all the details below! I will also share some lampshades that I have sourced from various retailers in case DIY isn’t your thing!
Let’s make a diy lampshade
For this pleated lampshade you will need….
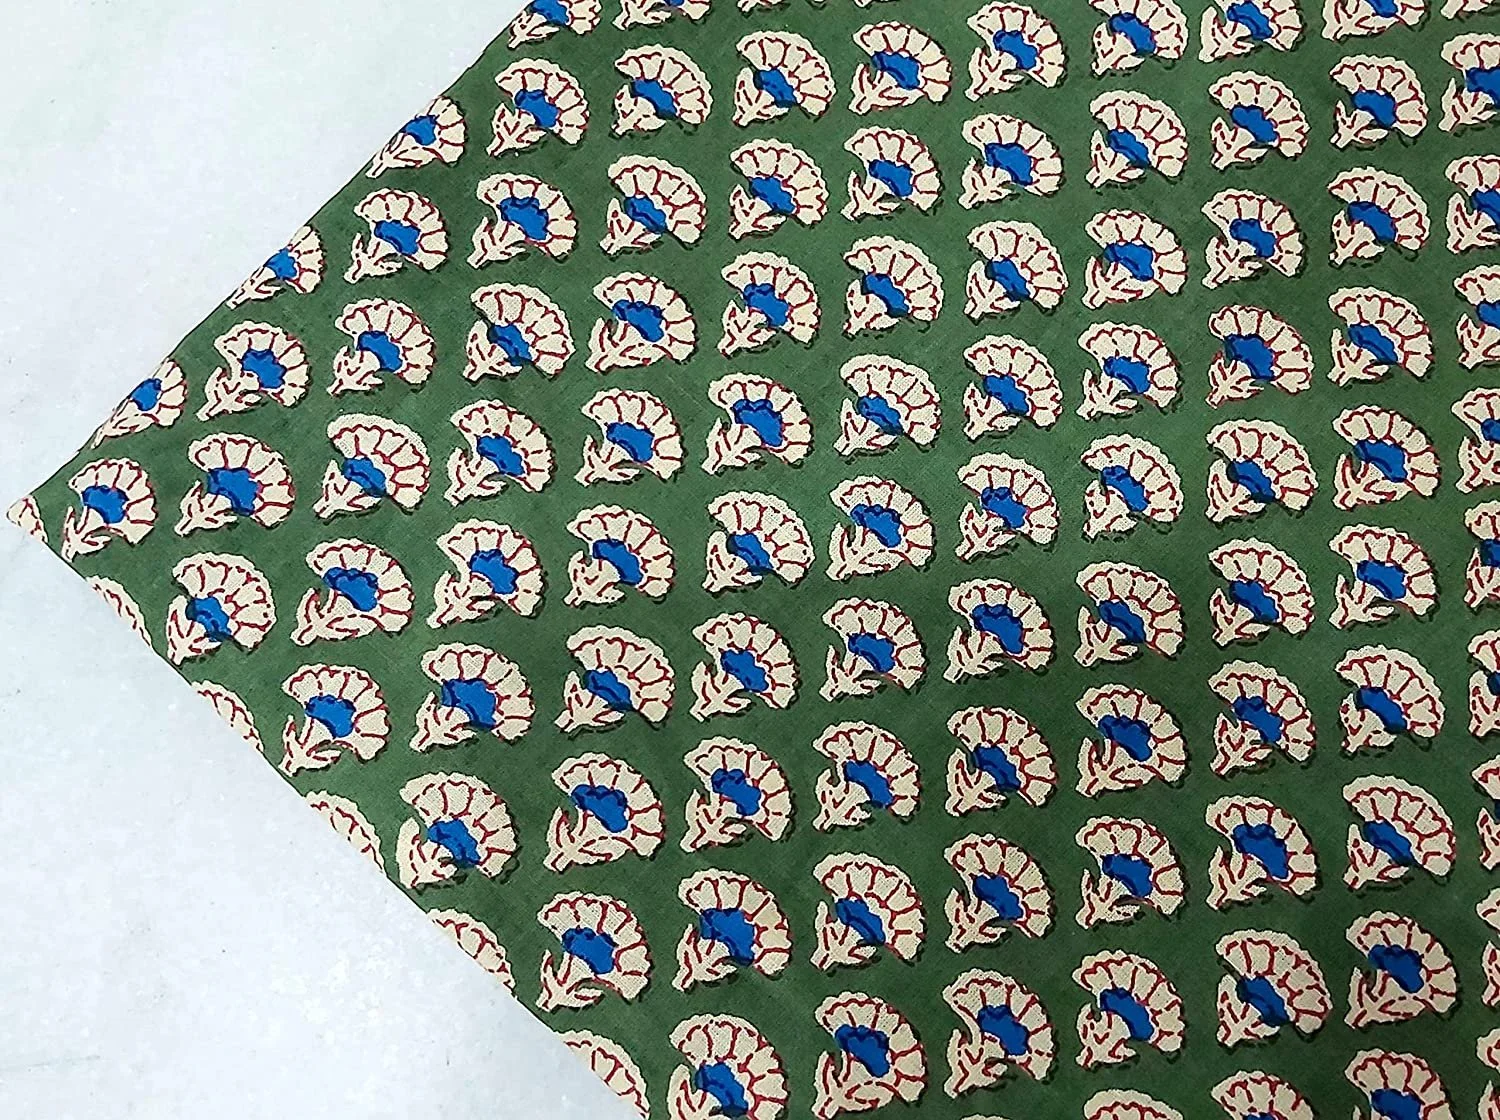
Fabric - I used this one.
Lampshade
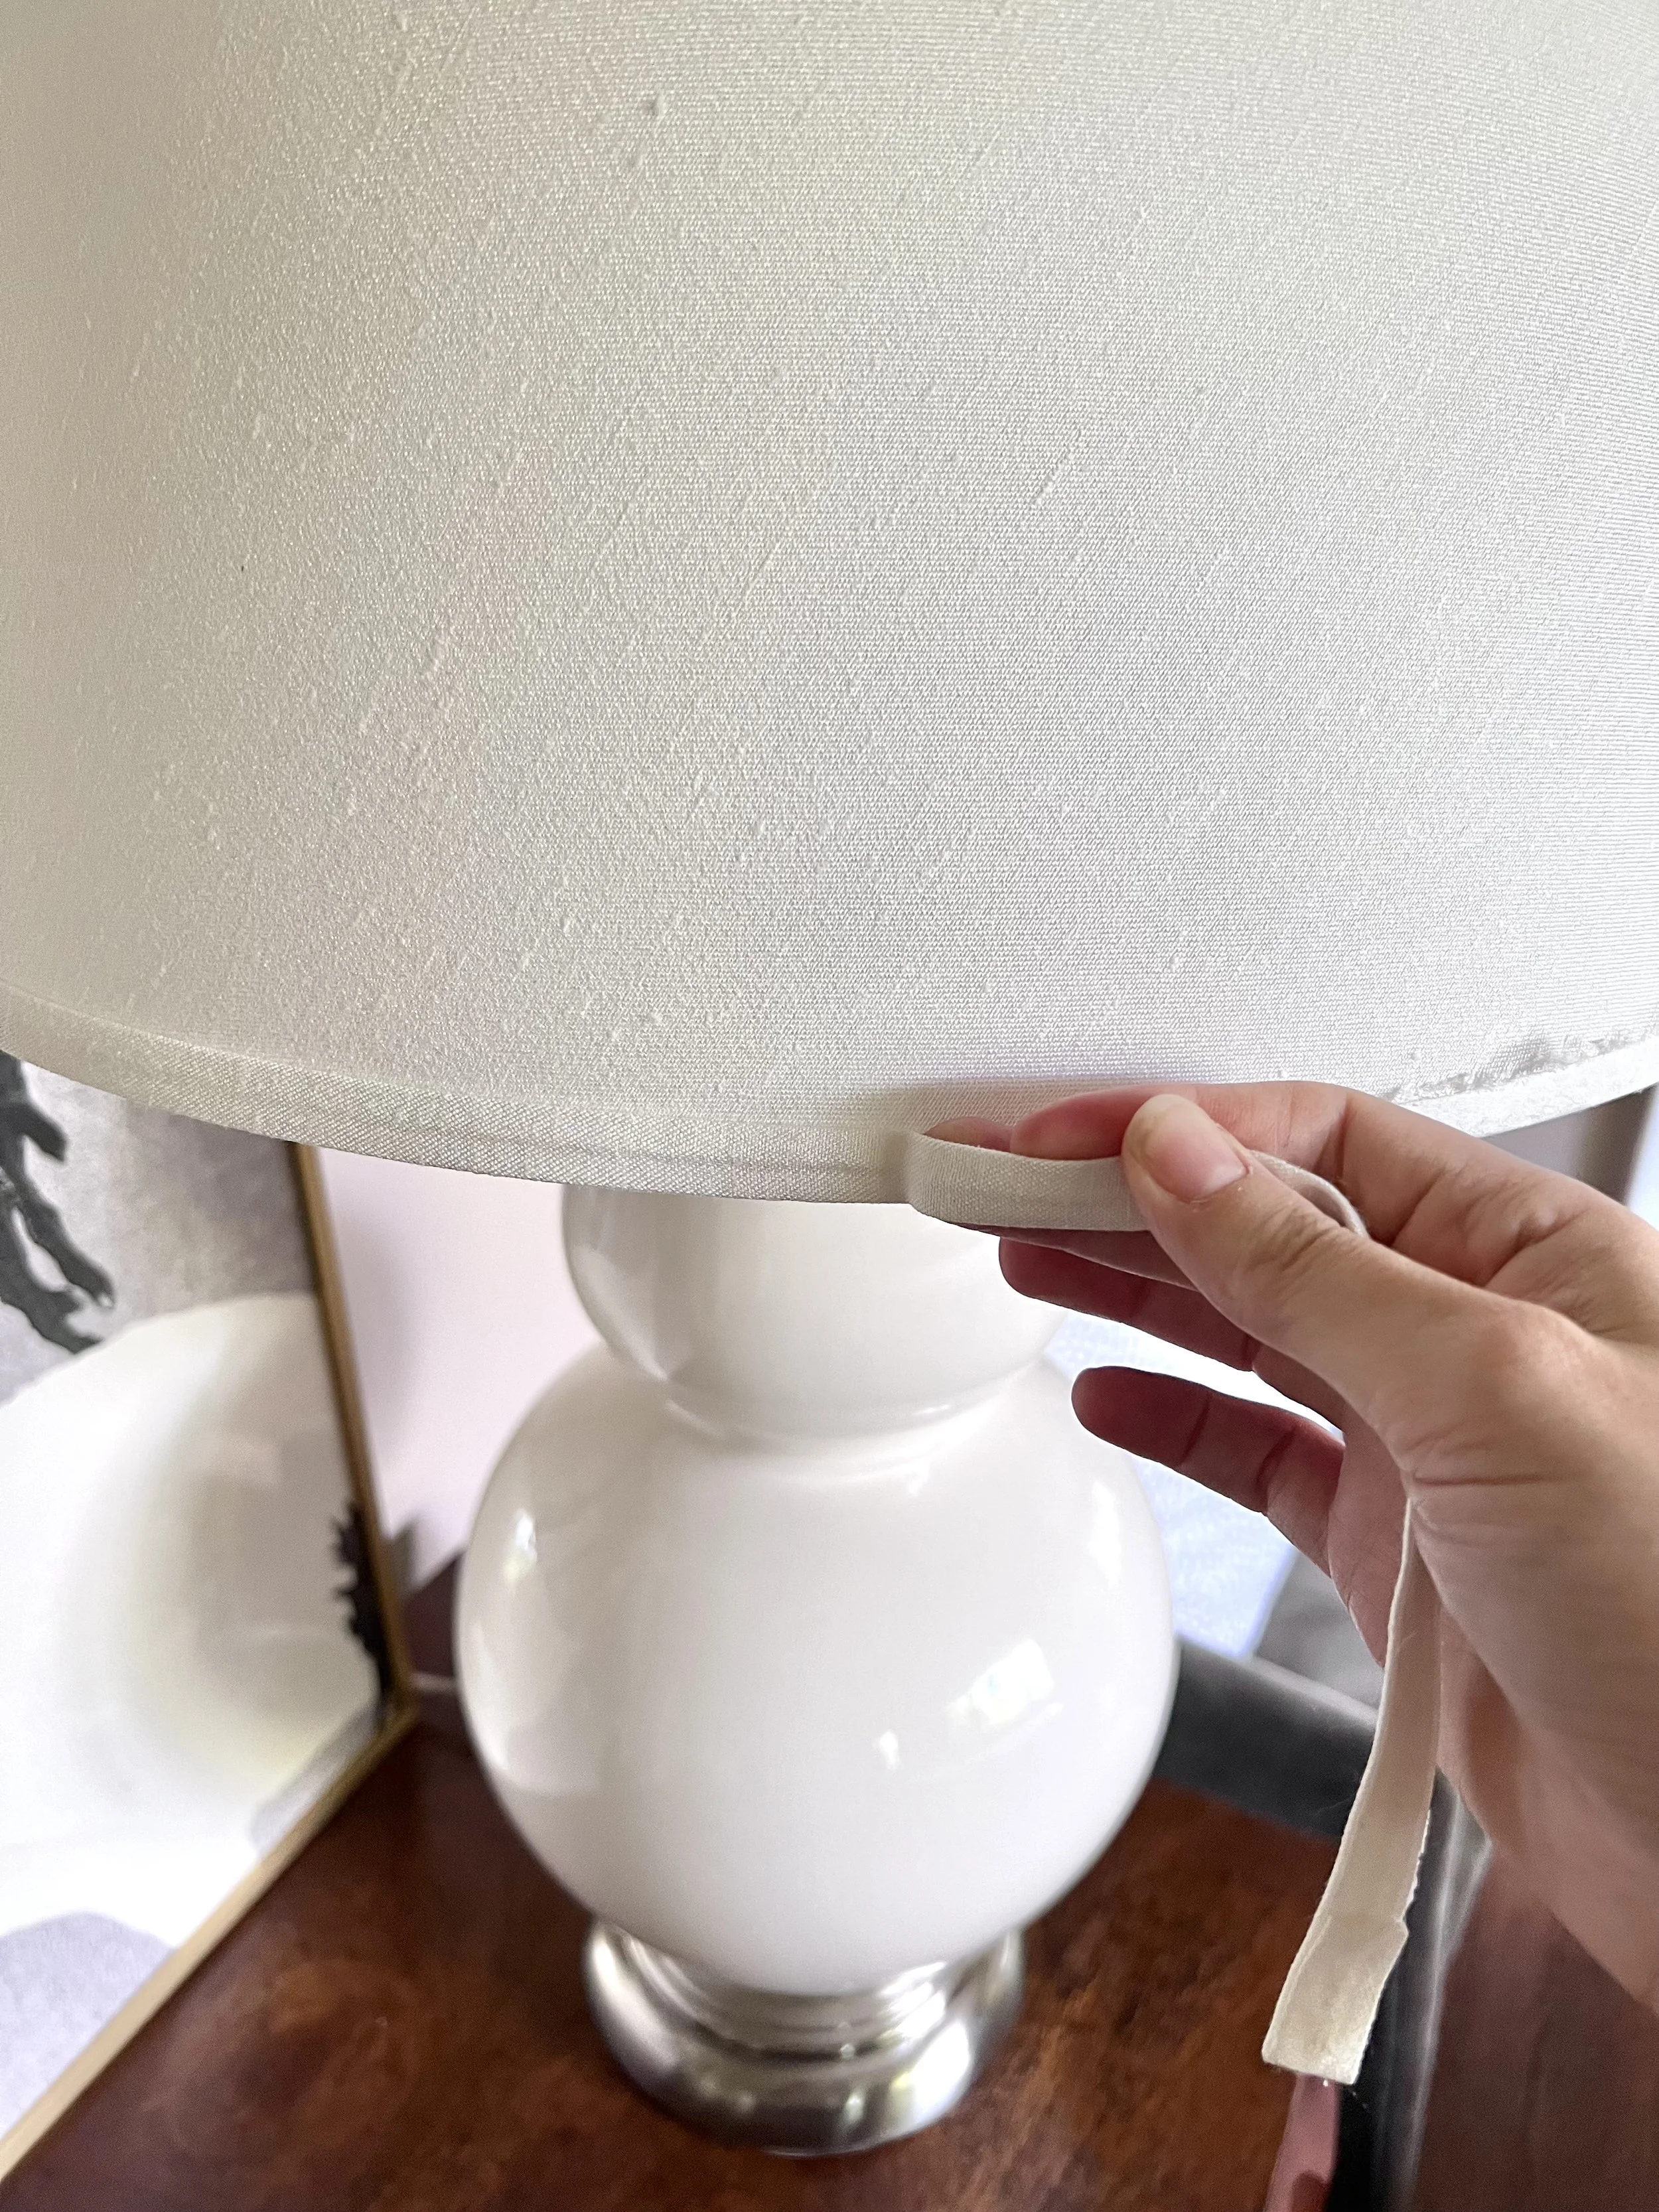
First, you remove the trim on your existing shade. Mine peeled off pretty easy! I saved this trim so I could use it again by covering, with a new fabric, when I complete the shade. Most shades have this on the top and bottom so you will need to remove all four strips.
Next, you begin pleating your fabric. You will need push pins, fabric, and scissors for this step. I ordered 5 yards of fabric to be sure I wouldn’t run out. I had plenty left over! I roughly used 2 1/2 yards for both shades. The amount of fabric you need is dependent on the size of your shade and the width of the fabric you purchase so keep that in mind. I did not have a very systematic way of cutting the fabric to fit. I just laid the fabric on top of the shade and made sure to leave about an inch at the top and an inch at the bottom. I cut the first piece and then cut multiple pieces in the same exact size. I used three different pieces, all the same size, so I could work in sections instead of working with one super long piece of fabric. I was able to hide the seams within the pleats. You can not tell that it was done in three different pieces.
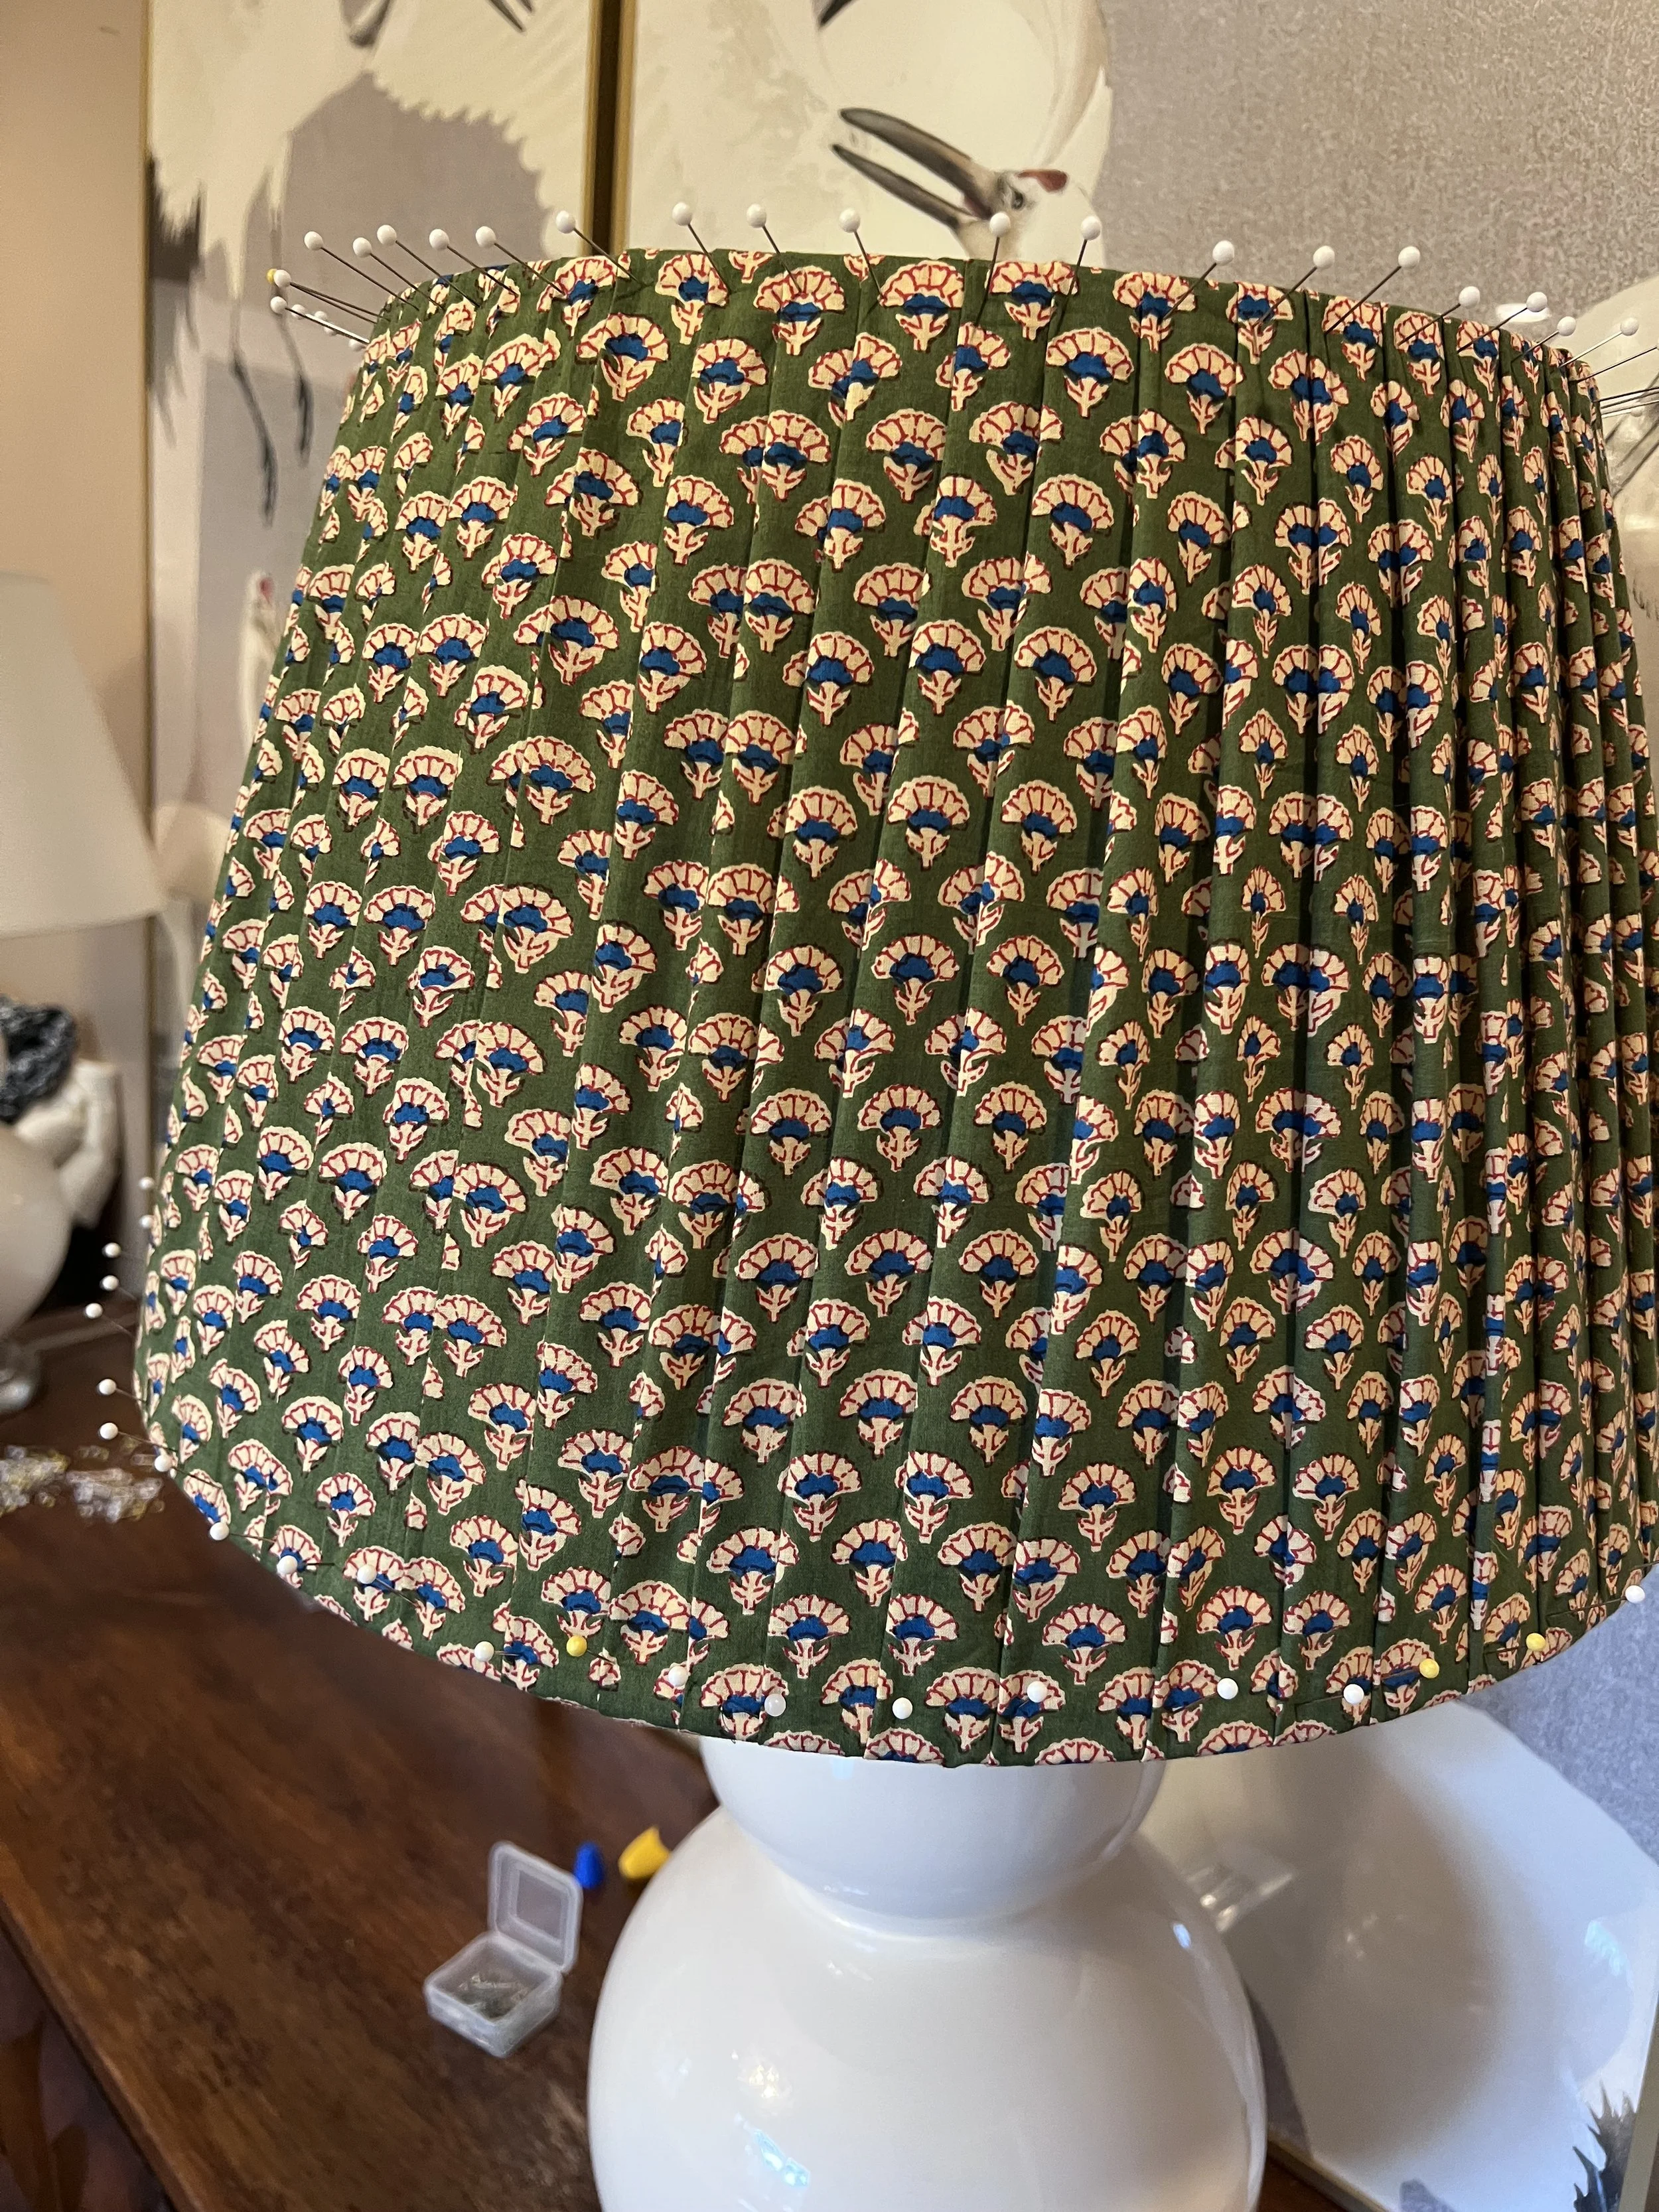
For the first pin, fold over the fabric so the edge is smooth. Then pin fabric to the top and bottom to the lamp shade. When pinning, make sure you fold fabric over to pin through the front and back fabric at one time. I made the mistake of not folding over the fabric at first and had to go back and re-pin. Once that first set of pins are in, you begin folding the fabric over to create the pleats. Fold and pin until you have run out of fabric and need to add the next panel. This part takes awhile but make sure to take your time on the pleats. I did notice that the pleats were skinnier at the top and wider at the bottom due to the shape of my lampshade. Make sure to fold over enough to create an actual pleat at the top and bottom. I always started pinning my pleat/fold at the top and ran my fingers down the fabric to pin at the bottom.
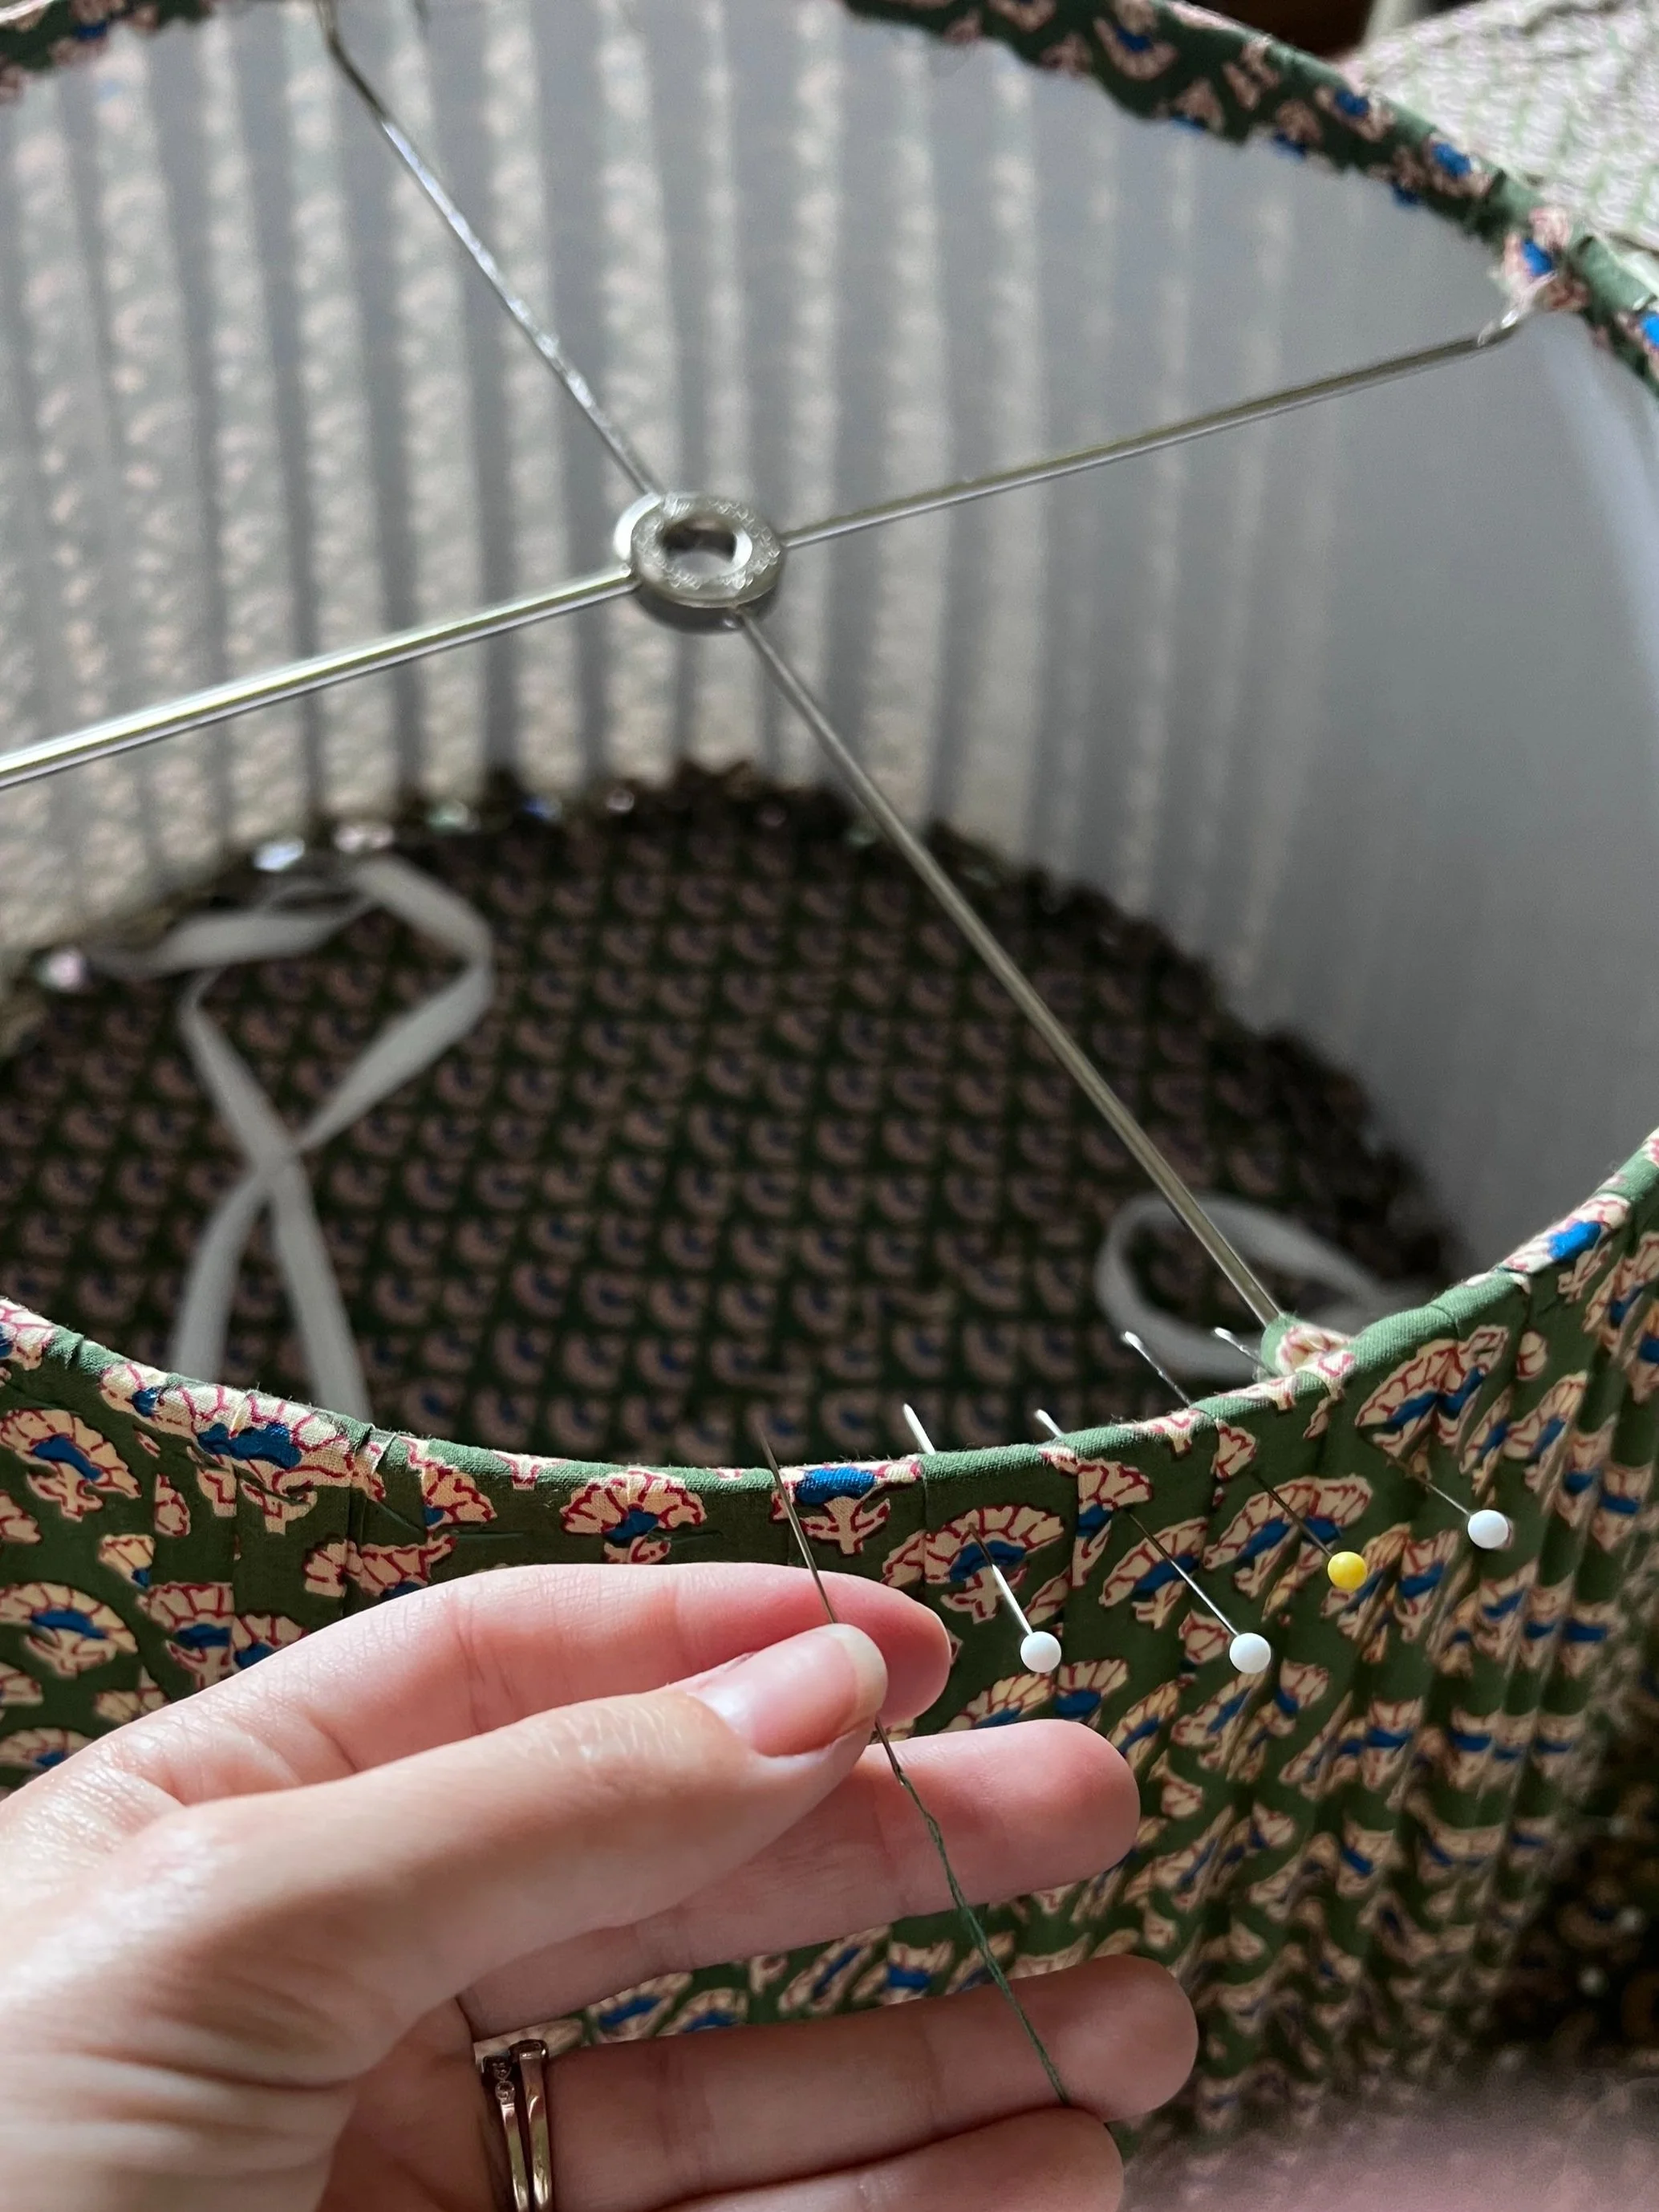
After you have pinned the fabric and fully covered the shade, you will start the sewing process. You will need a needle, thread, and thimble for this part. At one point during this process, I almost got out my hot glue gun to finish. I am glad I didn’t give up and kept going with the needle and thread.
First, thread the needle. Then push it through from the inside of the lampshade on the first folded pleat. This will help secure the fold in place. Use your thimble to thread your needle front to back, back to front over and over again until you have sewn down all the pleats. Complete the top of the lampshade and then flip to sew the bottom of the shade. Use a thread similar to the fabric so it will blend in.
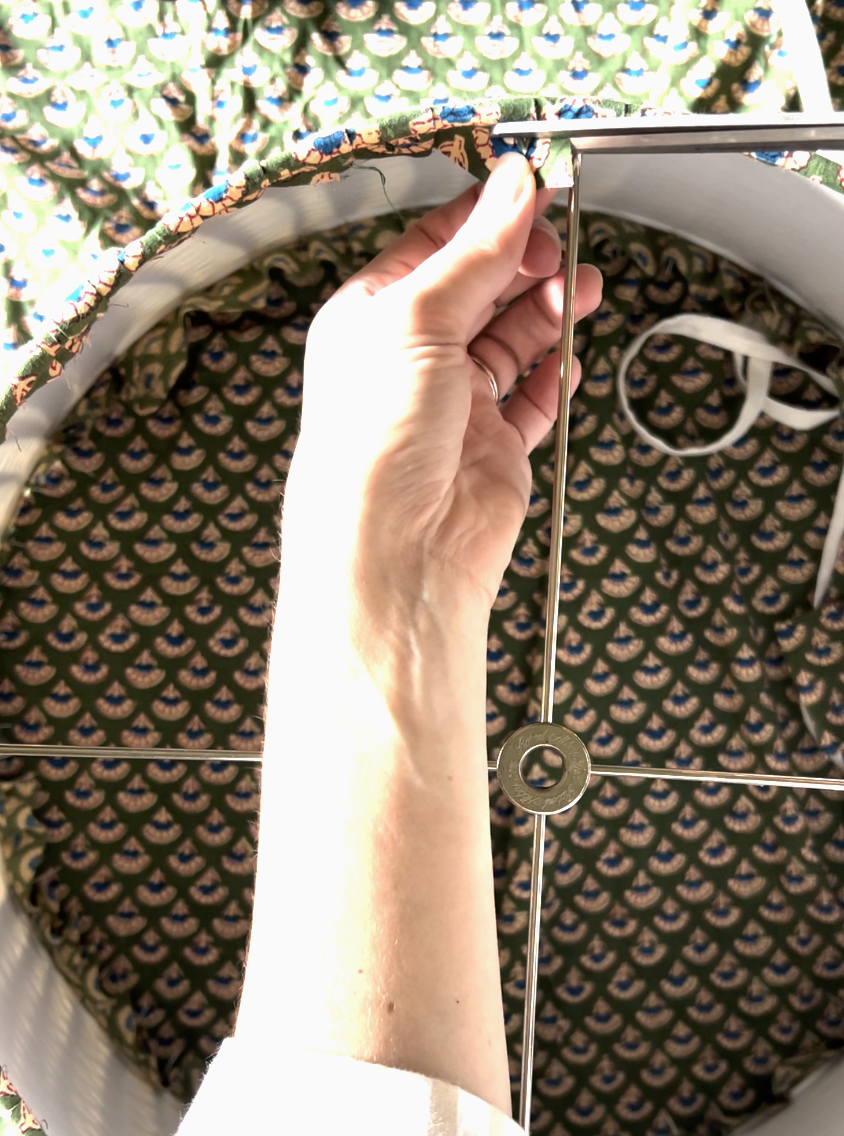
After you have sewn the top and bottom, use scissors to trim the excess fabric. Trim as close to the thread as possible. Then you will cover the cut portion with a clean piece of fabric to make the inside look crisp. Lastly, add the trim back to the top and bottom of the lampshade to finish it off!
Shop Lampshades