DIY Target Cabinet Makeover
This post may contain affiliate links, which means I may receive a small commission, at no cost to you, if you make a purchase through a link.
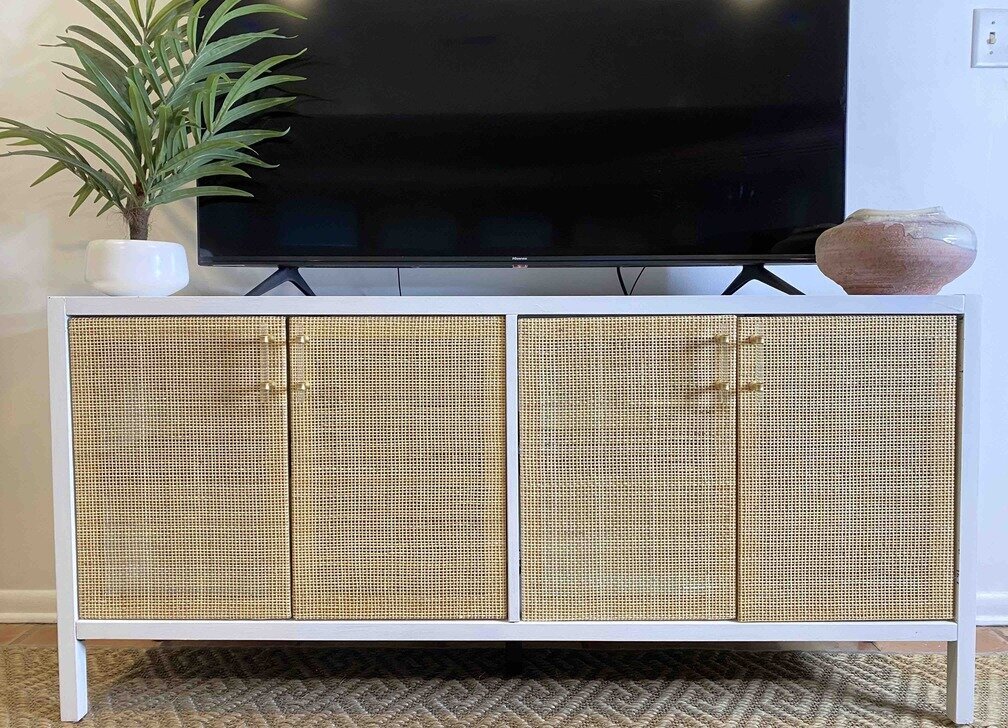
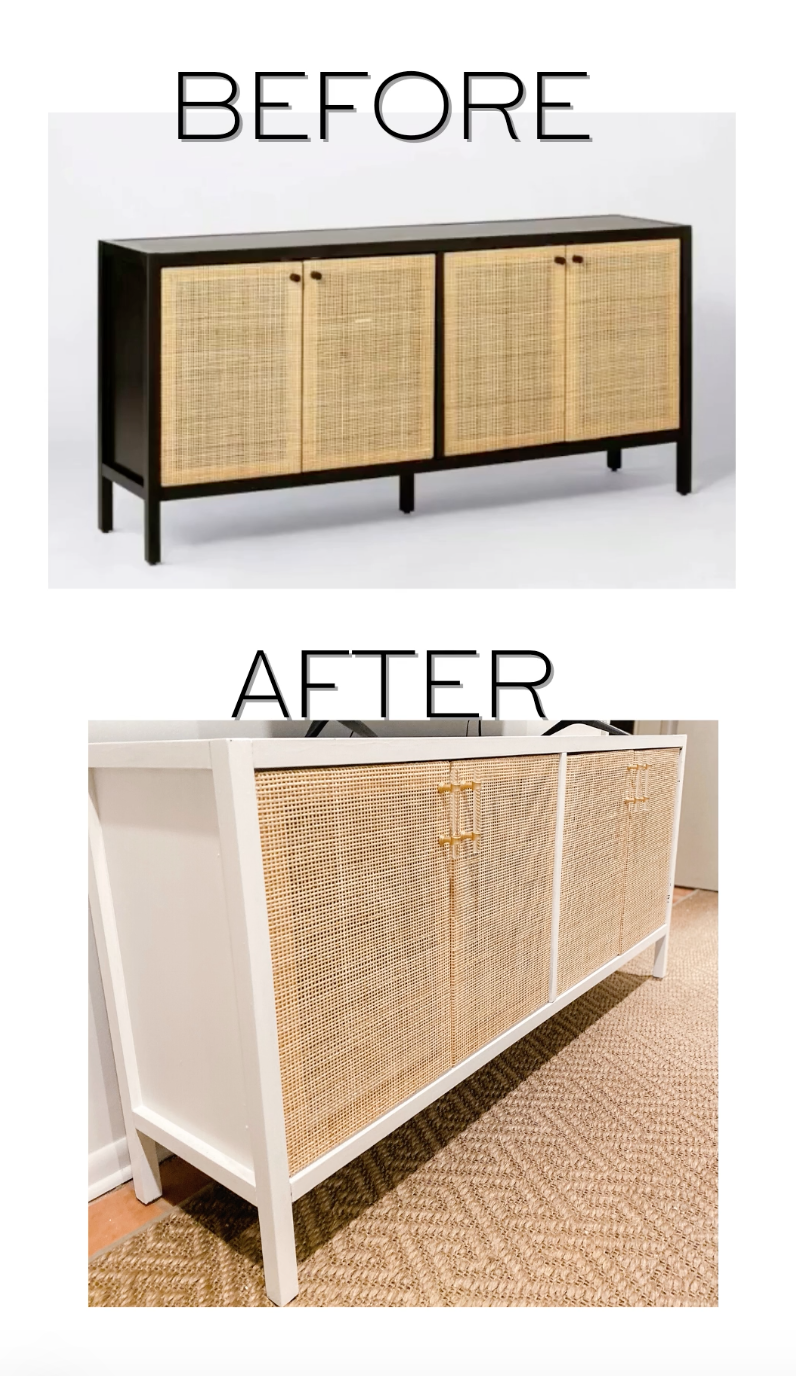
Have you ever purchased something knowing you were going to change it the minute it arrived? I honestly do this all the time so it’s no surprise that this cabinet is now white instead of black! I also knew that I would want to add different hardware to this piece to give it more Serena and Lily vibes!

I really love the Studio McGee collection from Target. There are so many beautiful pieces and the prices are amazing. I previously fell in love with a cane door cabinet from another retailer but it was around $2,000 which is not currently in the budget. When this TV cabinet was released, I knew it would soon be my next DIY home project.
You can grab the TV cabinet here.
I love the cabinet but knew that I wanted it to be white instead of black so it would fit better into my space. I would suggest staring with a deglosser to take the original finish off of this piece. Then begin to lightly sanding the piece with 320 grit sand paper. After it was sanded and cleaned, I painted on an oil based primer. The sanding and primer are both non negotiable. If you aren’t able to do that, do not paint this piece. It is not real wood so there is nothing for the paint to stick to if you do not do both of these things. The deglosser and light sanding will help give the paint something to grip onto.
Once the primer is dry, lightly sand again, and then begin adding your paint. I used Valspar cabinet and furniture paint in the color Swiss Coffee. It is a great color and has good coverage! I love the overall look of this piece and I am so glad that I chose to paint.
Side Note- I was told by others that have completed this project that they used a chalk based paint and it worked awesome! This is something to consider if you are wanting longevity in the piece.
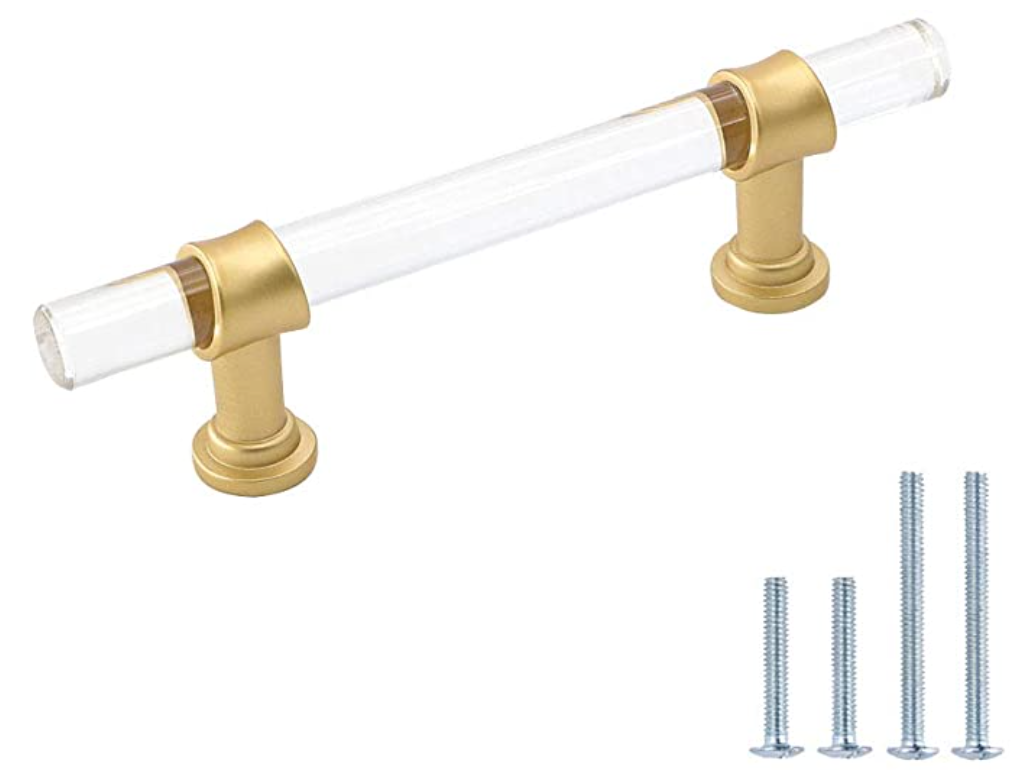
After the paint dried, I attached the cane doors and added new handles from Amazon for a custom touch. I purchased the 3 inch size and they are a great fit. I love the look that the acrylic and gold added to this piece! These would also look great on other items that you may already have like a side table or even kitchen drawers.
I am in love with the way this project turned out! It definitely looks much more expensive than it actually was. This piece would look great in a dining room, living room or even an entryway! Give this easy DIY a try. You won’t regret it!